Preparing the Insertion Rod with Steel Wire Coil
The wire coil is designed to be placed in the testing atmosphere with the use of a metal insertion rod that can be purchased from SSi. The parts of the insertion rod, shown in Figure 10 are as follows:
-
Shaft. A long metal shaft supports the working end of the insertion rod (where the wire coil is housed) and allows the rod to span the length of a typical furnace access conduit.
-
Threaded port connector. The port connector is designed to attach to, and provide a tight connection with, the access port on a furnace. NOTE: The connector is designed for a 1” NPT connection.
-
Protective cage. The protective cage provides housing for the wire coil when the coil is attached to the insertion rod.
-
Rod screw. The rod screw, which screws into the shaft through the protective cage, helps keep the protective cage in place on the insertion rod.
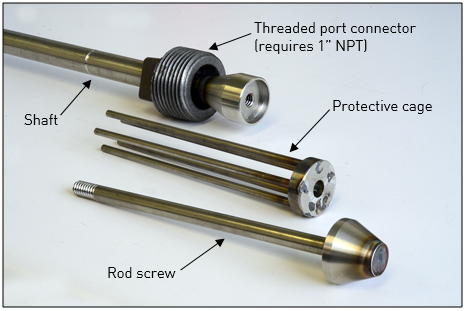
Figure 10 - Parts of metal insertion rod
NOTE: After repeated use, the insertion rod will gradually turn from its silver, “out of the box” color to a charcoal black color. This is due to the rod’s placement in the furnace atmosphere and does not affect its function.
To prepare the insertion rod for placement in a testing atmosphere, first slide the “wound” portion of the wire coil over the rod screw (Figure 11)
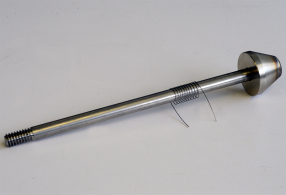
Figure 11 - Wire coil placed on rod screw
|
IMPORTANT!
The wire coil must be placed on the rod screw, not on the protective cage.
|
Next, slide the rod screw through the opening in the protective cage (Figure 12).
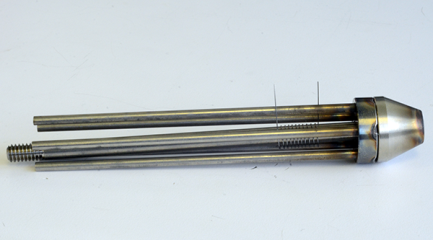
Figure 12 – Rod screw inserted through opening in protective cage
Finally, insert the protective cage and rod screw into the insertion rod (Figure 13); hand tighten the rod screw until it screws into place tightly on the insertion rod. Ensure that the “legs” of the protective cage are inserted into the metal stopper on the insertion rod.
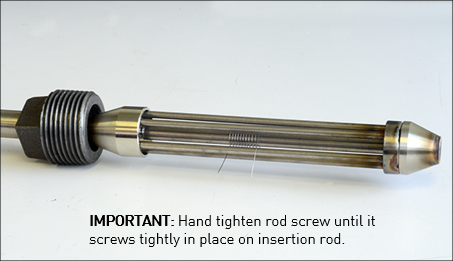
Figure 13 - Protective cage and rod screw attached to insertion rod